Progress Report #8 (2014)
Store Visit and Meeting with Mechanical Engineering Professors – by Aireen
On 2/17, we went to Home Depot and Michaels Art and Craft Store to make selection for our cooler material. We had in our considerations a few building materials like MDF, polystyrene and thin pine wood. All these materials are relatively cheap, easily available and lightweight. At first, we would like to use large piece of wood as it is really light but strong at the same time, but we realized that we are not trained to cut and shape our wood piece. Hence, we opted to choose polystyrene and thin pine wood which are much easier to work with. At the end of our visit, we ended up buying two piece of thin pine wood and a disc-shaped polystyrene at Michaels Art and Craft Store.
On 2/18, we had a brief meeting with Prof. Frampton (Mechanical Engineering professor) to get his advice on our project. He verified that the concept of our project is feasible. He also gave us the website source where we can find and order our material online. Plus he suggested us to visit the Design Studio and ask for mentors’ help when building our cooler. He also gave us an idea on how to install the release mechanism of our design. He suggested that we can use a piece of metal and a servo to create a trap door that can help control the entry of our blood bags into the cooler.
On 2/19, we met with Prof. Withrow and gave him the big picture of our design. He suggested us to modify the body shape of our cooler from circular-shaped to rectangular shaped. This is because Vanderbilt machining lab does not have the capability of bending a plexi glass. We can only cut our plexi glass either horizontally or vertically. He even showed us the type of acrylic sheet that we can easily order from Amazon.com. He also helped us redesigned the shape of our compartments. The latest design of the cooler compartments can be found at the section below. Plus, he thought that having a rotating compartment is not a good idea since we will be storing most of our electronic components in the bottom compartment. Hence, we changed our design by having a rotating feeder.
Torque Calculations and Improved Design – by Zulhilmi
The final design is an integration of past designs and is deemed most feasible in terms of building. We have omitted the cooling system in the design, in order to focus on the scanning, sorting, and dispensing system of the cooler. The final sketch and the dimensions are as follows:
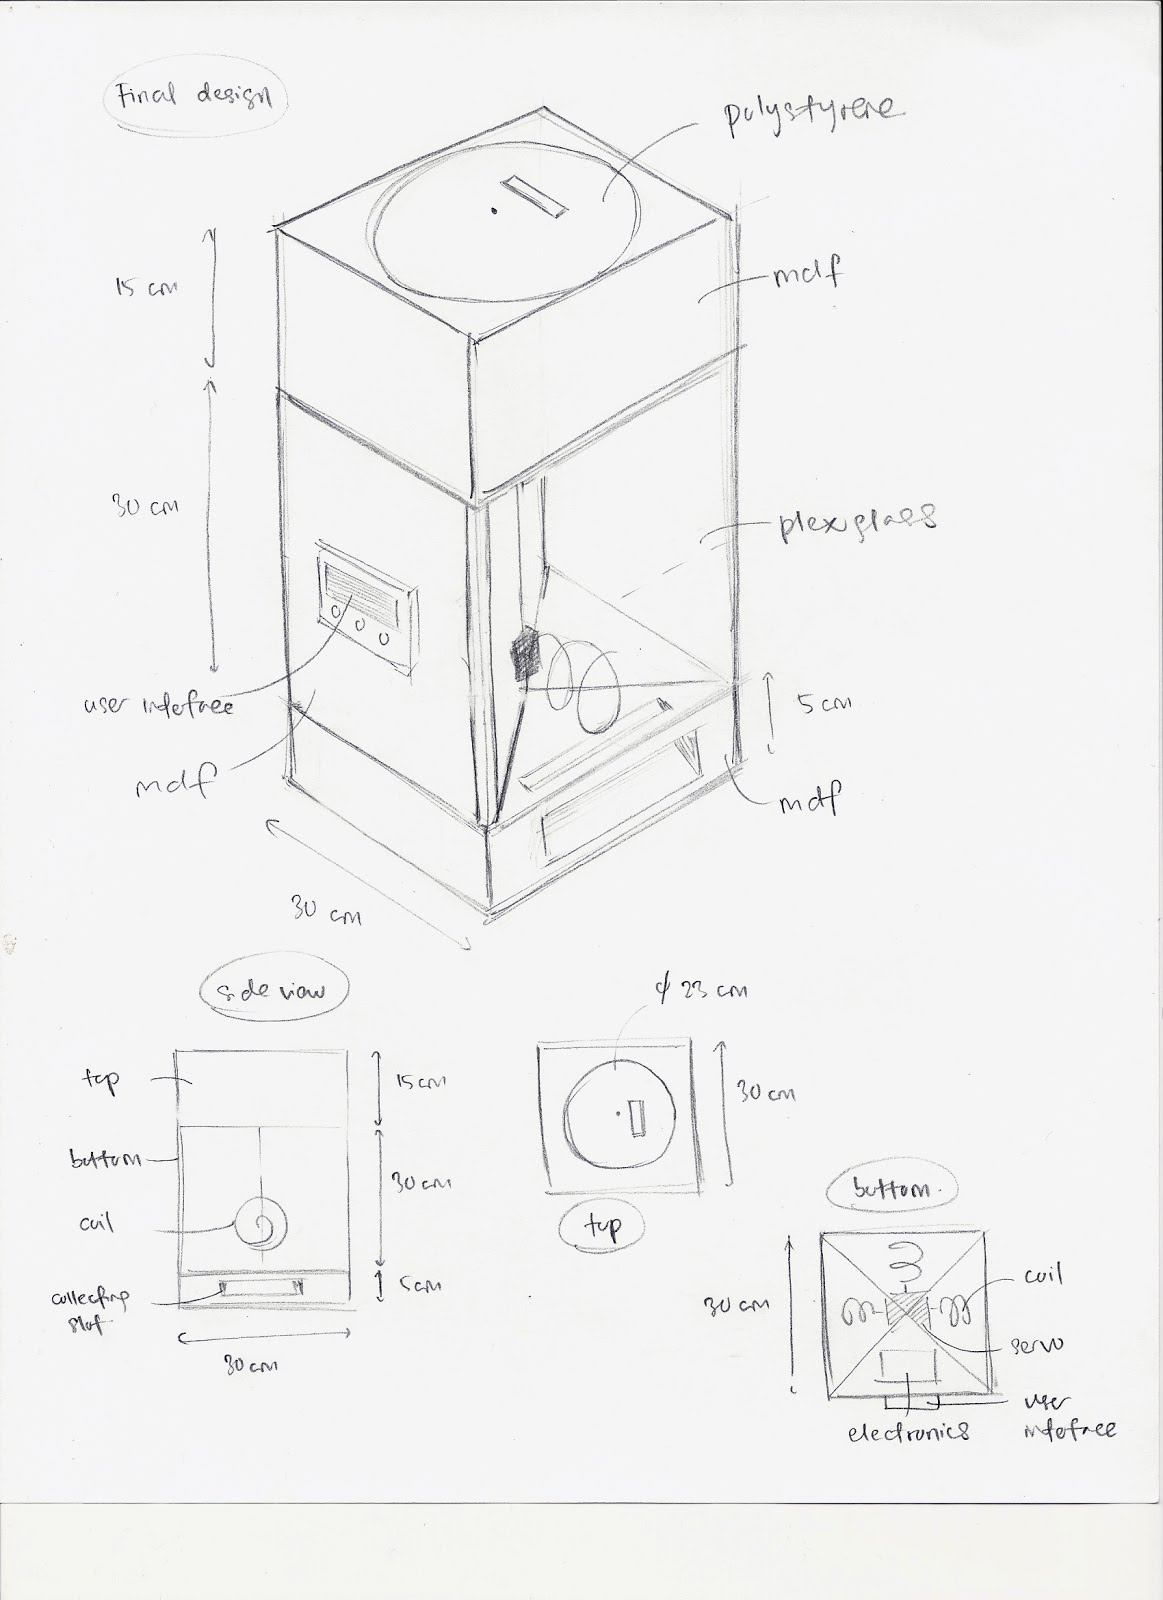
Sketch of the final design
The smart cooler will be made from medium density fibreboard (MDF) and plexiglass as these materials can be easily cut using the laser cutter. The lid of the cooler will consist of a rotating polystyrene block that will be embedded with the color scanner and can be rotated using the feeder servo. All compartments will be installed with a servo and a dispensing coil, except for one, where all the electronics will be kept in. There is a user interface which can be used to request a particular blood product, and the blood product will be dispensed and can be collected in the collecting slot.
Using torque calculations, up to two blood bags can be stored on a coil at a given time. The servo used has a torque of 3.3 kg.cm, and each bag will have a load of 1.6 kg.cm (torque = radius.mass = 4 cm*0.4 kg = 1.6 kg.cm)

Block Diagram: parts interaction in the cooler
Components Ordering and Dimensions Measurements – by Hakim
Once we gained some advice from Mechanical Engineering Professors and came out with our improved design, we presented our improved design with details and dimensions to Dr. Walker in two presentations, on February 20th and February 27th. Right after approval from Dr. Walker on the February 20th, we ordered the following components with their dimensions and expected to arrive the beginning of next week.
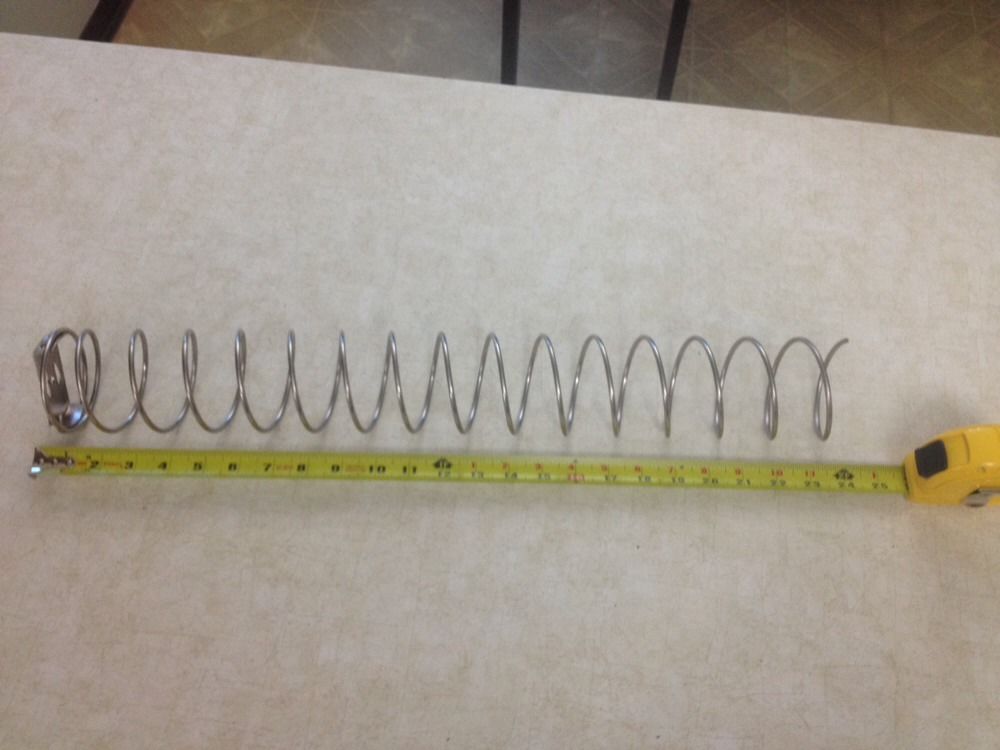
Dispensing Coils x 6: radius = 4.00 cm, spacing = 3.81 cm, length = 22.5 cm
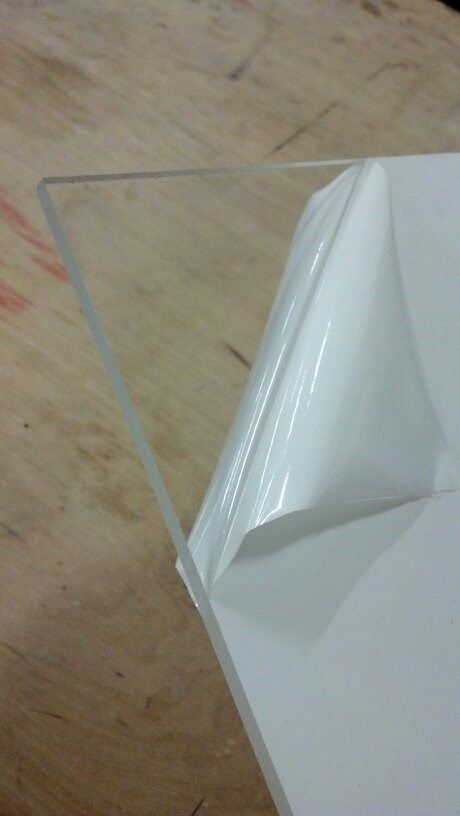
Plexiglass Acrylic Sheets x 6: 0.32 cm x 30.42 cm x 30.42 cm
We also presented parts of our design schematically-separated with dimensions (shown below)
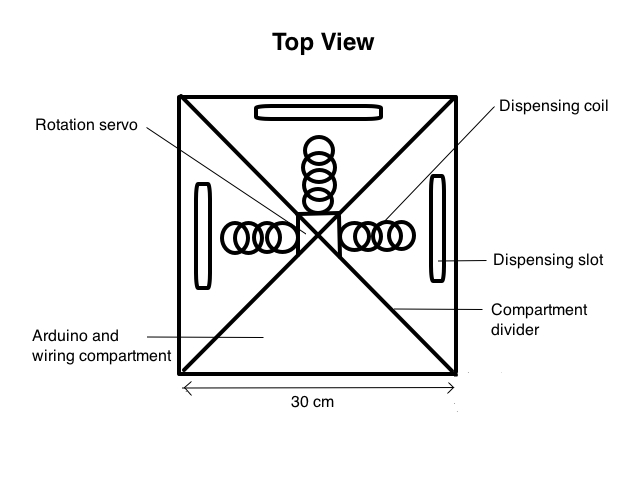
Top view of the dispensing compartments
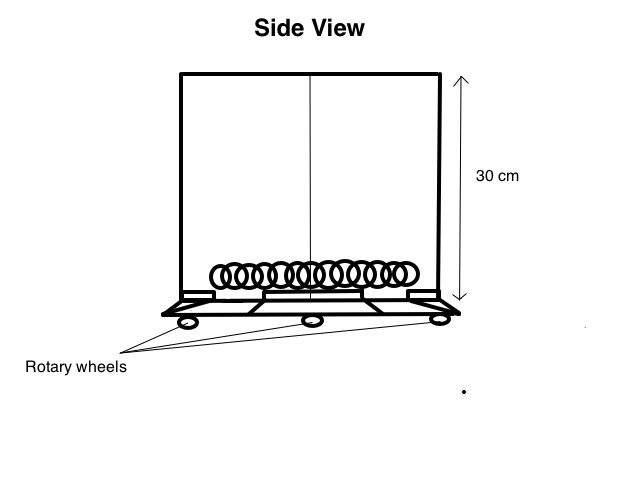
Side view of the dispensing compartments

A closer view into the blood products compartments
At this stage, we are focusing on dispensing, and we are done at this stage we will focus on the lid and scanners which is the scanning and sorting part. So far, we already got the Arduino Uno and the Parallax servo motor. Once the all the components we ordered arrive, which expected to arrive next week, we will start cutting and assembling the plexiglass acrylic sheets and begin coding the arduino to move the servo.
©2026 Vanderbilt University ·
Site Development: University Web Communications